Archive for January, 1999

Tuthill Polar Alignment Calculator by Ray Porter

If you own a Tuthill Polar Alignment finderscope then this free little utility written by Ray Porter is something you need. Thanks to this handy utility I have never even had to look at the Tuthill Polar Alignment scope’s rather complicated instructions.

This is a more modern version of an an old QuickBasic program also available as freeware on the internet.

Some important modifications have been made such as adjustment for longitude, daylight savings time, and time zone, but is still fast, light weight and very easy to use.

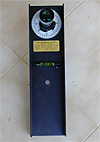
The program asks you for your date, earliest setup time, latest setup time, your longitude and time zone and does all the calculations for you. The results can be read and discarded or the report can be copied to the clipboard.

If you want a copy of TPACalc just send an e-mail to Ray Porter and he will e-mail you the program.

Click image for larger version


MouseCam – Conectix QuickCam Mods

I finally managed to track down a used Conectix black and white wecam on E-bay and after a few weeks I was testing and tweaking to my hearts content.

I quickly realized I was going to need some sort of box to put this thing in so it would
attach to the scope more easily.

After rummaging around some old computer equipment at the office I came across an old IBM PS/2 mouse. Hey, the dimensions were right… Its really light, the hole at the bottom seemed the right size… Well why the heck not??

As it turns out the hole on the bottom where the mouse ball goes in is the exact size of a 35mm film canister. I had to break off and sand down the plastic that held the ball cover in place. Not too much as I was going for a tight fit. If fact the fit turned out to be so good that I didn’t even bother to glue the canister in place.

I had a laugh when I discovered that the IBM mouse’s guts were made by Logitech. How ironic… (Conectix was bought by Logitech.)

On the inside of the mouse the Conecix PCB fits perfectly and the cable is about the same size as the old mouse cable so I could use the plastic guider and retainer that was already part of the mouse housing.

To hold the wecam board in place first I made an outline with an permanent marker of where I wanted it to stay, and eyeballed more or less the best places for the screws to go and marked them as well. Then I took one of the thicker type paper clips and heated up with a lighter and melted guide holes through the marks I had made.

For the bolts, I ransacked a couple of old serial cables. The type that go from the mother board and end in a 9 or 25 pin D connector on the computer box where you plug in your mouse or modem or whatever usually have a hex-nut that is the perfect size for this job.

I removed the hex nut with the screw and the little bolt on the inner side of the 9 pin connector and used the hex nut on the inside of the mouse and the bolt on the under side to tighten it in place.

The Conecix board is held in place by a strip of plastic I cut out of an old QIC-80 tape
box. It was easy enough to cut with scissors without breaking. I made melted a whole on either end with a paper clip and threaded two more hex nuts. This was then screwed on top of the circuit board into the hex nuts already in the mouse body. (as seen in the picture below) Nice tight fit. and all ready to close up and pop it on the scope.

And here’s a bottom view of the finished product. It is very easy to align the CCD to
center as the fit is tight enough to hold the board in place from an occasional bump, but not tight enough to keep you from putting it back into place with your fingers if the alignment goes off.

Eventually I’m going to try to setup a computer fan on the other side of the mouse so I can cool my… MouseCam!

One great thing I discovered is that since the ccd chip is much closer to the eyepiece
than in the regular ball housing the camera is now very close to par-focal with my Meade 9mm illuminated reticule eyepiece.

Hey! Whats that on your OTA?!? If nothing else a mouse hanging off the back of your telescope does attract a lot of attention. My father and I had a laugh at how ridiculous the thing looks on the LX50. But, hey… Its works!

Check my astro gallery for images taken with modified webams like this one: http://astroturtle.com/imaging/


Converting a WebCam for Astrophotography

The method described here works for most “ball” cameras. Mainly for the old Connectix (now Logitech), and QuickCam VC type.

Don’t forget that this sort of fun and games will pretty much void your warranty, and if you kill your webcam by mistake in the process, then that’s it. Get a new one…

The Logitech and Connectix webcams all have a small hole on the bottom. Sometimes it is hidden under a sticker, but its there. If you stick a small screwdriver or even a paper clip into this and twist to on side the the 2 plastic shells that house the circuitry should pop open into 2 halves.

Remember not to force it, if you do this right, the plastic shells will click back together like new. Even if you break the plastic tabs inside, (like me!), don’t worry. Usually the whole thing will stay together anyway. If not a loop of tape around the ball will do the trick.

Once you’ve got the webcam open take a look and try to remember where everything fits, as some of these little buggers can be a bit of a puzzle to put back together. Pull out the guts of your webcam an take a look at the circuit board.

On the lens side you’ll have the lens and the lens housing attached. On the back side you will see the 2 screws that hold the housing in place (2nd image on right, circled in red). You will need to unscrew these with one of those really small screwdrivers the Swiss usually reserve for watches. 🙂

Once you have the lens housing off, unthread the lens from the holder and look inside. You’ll see a small piece of blueish glass. This is an infrared filter. If you want to see something neat, point a TV remote at the webcam and press a button when its completely assembled (i.e.: before you did all this crap to it!) You’ll see the LED’s light up on the capture application. When you remove this filter the webcam becomes even more sensitive to the IR range of the spectrum.

If you’re using a refractor this might not be a great idea as IR light tends to be slightly out of focus in achromatic refractors. On the other hand it is one less piece of glass in the way and makes the camera slightly more light sensitive.

Experimentation and judgment are the best policy here.

Tip: I like to keep those 2 screws in the housing. I drop them in there and thread the lens back on. Its a nice, safe place to keep from loosing them!

Now you reassemble the webcam. 

Looking down the front you should see the exposed CCD as in the first image below. If the housing is having some trouble sticking together (very rare) just wrap some tape around it. Be careful of the series of small holes in the plastic on either side of the webcam. Try not to cover these with tape, as the let some air into the CCD and the circuitry.

Next you’ll need a 35mm film canister. The black Kodak type are best. It turns out that the film tube is about 1.24″ in diameter, and fits perfectly into standard 1.25″ eyepiece holder. You’ll need a descent x-acto knife to cut off the sealed end of the tube and trim it so its as flat as possible. I like to keep the end with the “bump” around the rim, (the end the cap fits on), turned towards the webcam as otherwise it would bump against the lock screw on eyepiece holder.

The easiest way to tape the tube onto the webcam is to wrap some tape all around the bottom of tube so its half on, half off, and then make slits in the tape so you’re left with 4 equal parts. Then you fold them out so your film tube looks like the 3rd image below.

Now comes one of the tricky parts: Do your best to get the tube as in line as possible with the CCD. This is a trial and error thing. No way around it. But once its lined up to your satisfaction press the tape down onto the camera body to hold it in place.

Now you’re going to want to wrap a LOAD of tape around the ex-film tube / webcam body. The whole weight of the webcam, plus any accidental pulls and tugs on the cable are going to be resting on this tape so, take it from me: Don’t be stingy!

Tip: Over whatever tape you use, place some black electrical tape. This cuts down on stray light entering the tube. I don’t like to use just electrical tape as it doesn’t seem to do a good a job at holding things together. Maybe its the tape I use… 😉

Tip: Paint the inside of the film tube with some matte black model airplane paint or use some black construction paper to line it. The inside of these film tubes are usually very shiny. This causes some wild reflections when doing lunar photography.


Completely assembled your webcam should now look something like the one pictured here inserted into the standard Meade 1.25″ Star Diagonal. Although I have seen better methods listed at QCUIAG and other websites, I especially liked this one as it is a completely reversible process.

Check my astro gallery for images taken with modified webams like this one:

http://astroturtle.com/imaging/


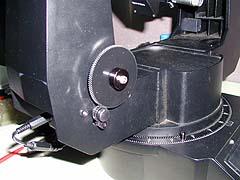
Meade LX50 DEC Axis Issues

Hoo boy, did I have a sick DEC axis. l think I only started noticing it when I started guiding long-exposure shots as it was on the most part livable for the visual stuff.

I had a few problems:

  1. Reversing direction quickly back and forth several times would actually “crash” the LX50! The power led would start blinking and all I could do was power off, wait a few seconds and power on to get it to respond. Kinda’ like an operating system or two that I won’t mention here! ;o)
  2. Speed of motion on the DEC axis had nothing to do with the RA axis. Either it was Speedy Gonzalez or the motor would actually come to a grinding (seriously – grinding) halt.
  3. When I reversed direction it would take a long time before whatever was in the FOV actually moved. It was like slack was being picked up somewhere in the tangent arm.

None of this is very good when you’re trying to guide a photo on a $%&# guide star you can barely see and I won’t even go into what an autoguider will try to do…

Problem 1 was the easiest to solve. It was pretty obviously power related but after trying fresh batteries, NiCads, even a blasted 9v the “blinking light” weirdness persisted. After some good advice (always!) from the folks at SCT-User I decided to give it a go with a little 12v, 1A power brick. That did the trick and I’ve never had any problems since. Seems the problem is
related to current and how much current batteries can sustain. Phil Chambers explained what was going on much better than I ever could in a post to the SCT-Users group:

“The issue, as Rod said, is the gearing which loads the motor down. What is probably happening is the motor is loaded, its cold so it moves a little harder so the motor needs more current but as it gets more current, the voltage drops and the spiral is to stall the motor. You must realize that a DC motor uses MAX current at stall. As it goes faster it uses less current. The alkalines simply have to much internal resistance to play this game. As the current starts to rise, the alkalines voltage starts to drop…”

Thanks for the explanation Phil. Since I do all my observing from my back yard this so far hasn’t been an inconvenience. Eventually I’m going to have to deal with powering the scope properly in the field but I’ll do a write up on that bag of beans when I have to face it! :o)

Problem 2 is the #1 gripe about the LX50’s DEC and whenever you mention you have a DEC problem with this scope on most newsgroups about 50 people will step forward and say in one voice: “Scopetronix LX50 DEC Fix Kit” [Link to the Internet Archive – Unfortunatley ScopeTronix went out of business some time in 2008.]

I am now one of those people! 😀 Wow what a difference! I had never noticed how tacky and plasticy those Meade gears were until I had the kit installed on the scope. (I bought the 108 tooth aluminum gear version)

In my opinion if you’re having DEC problems ordering the kit should be the first step. Mechanically the motors no longer “freeze” no matter what you do to them. You can stop the motor turning by grabbing the 108 tooth gear but let go and the motor just keeps on chuggin’ along. I was impressed already.

As far as guiding is concerned the DEC speed is much slower and smoother. At 2x I now have to press and hold down the button on the key pad and just watch the star glide where before it was more like tap… Oh $%&# where’d it go?!

Actually the DEC speed is now slower than the RA speed and as a matter of opinion that suits me just fine! At 32x for me the speed is still quite acceptable as I’ve always gone either straight for the DEC knob or just unlocked the thing to slew more than a few degrees anyway.

A Final note on the motor revision and ROM version. Its stated on a lot of web pages including the Scopetronix page that the best combo is the 16 2/3 motor with the newer ROM (v6.0). My LX50 was bought in late 1999 and I have the newer 33 1/3 motor and the new ROM version and in my case the Fix Kit works great. So far I’ve guided a few shots with the kit installed but have yet to test it with the autoguider.

Problem 3 didn’t take long to locate but I had a heck of a time figuring out how to cure!

Even after installing the DEC Fix Kit I had a lot of back and forth motion along the long DEC screw the tangent arm attaches to.With the DEC locked I could grab the tube, shift it back and forth and watch the DEC knob move slightly in and out.

I won’t begin to go into the amount of little corrections I tried to make or how many times I removed the DEC screw to try to figure out what was going wrong.

Removing the DEC screw is a pretty basic procedure: With an allan wrench remove the DEC knob by loosening the screw that holds it in place. Do the same to the locking nut and push the tangent arm forwards (i.e. the OTA moves north) to disengage the DEC gears. When the gear is loose you can spin it easily until the threads run out on the nut attached to the tangent arm then just pull it out slowly. Do yourself a favor and note where all the little washers go, in which direction, etc. :o)

I tried washers to take up the slack but all they would cause is binding making the motors work harder and make the DEC motion very irregular.

Eventually I noticed the brass ring on the gear side (seen in the top picture with the 108 tooth gear removed) would be pushed out in one direction until it could go no further before the DEC arm would start to move and then be pulled back in when moving in the opposite direction.

AHA! This little ring has a flange on one side that keeps it from sliding through the hole in the fork arm. I had the flange pointing _outwards_ and doing a pretty useless job of staying in one place when the screw would naturally try to push or pull against it as the locking nut is on the inside!

So once again I took the whole thing apart so I could reverse the ring and see what would happen. In the second picture you can see the brass ring in a “corrected” position. There is a washer between the ring and the locking nut to keep the locking nut from binding. After about 2 seconds of slewing in DEC I was positive that this was the gremlin I had been hunting down. DEC motion was smooth in both directions and while the slack was a _lot_ less some was still there and probably could be reduced. With the DEC locked pushing the OTA in the N/S direction would produce minimal movement.

The easiest way I found to reduce the movement that was left was simply to take a cheap pen apart and use the spring to push against the DEC knob. The spring takes up whatever slack is left and so far has done a really good job. There is no binding and the slack between directions is as small as I can make it without replacing the screw and nut with a finer more accurate thread. The spring should be fairly strong. I tried a couple of pens before deciding a spring that I pulled apart slightly so it would have a bit more tension. In the whole process experimentation is important and, as usual, YMMV (your mileage may vary)…


Meade LX50 Hand Controller Fix

This happened to me on my 3rd night out with the scope and from what I’ve read elsewhere its a pretty common problem. Some of the keys didn’t work, the declination axis worked in one direction, etc… Don’t panic if this happens to you! All that’s going on is that a connector inside the hand controller has come loose.

If you open up the controller it should be pretty obvious what’s going wrong.

Remove the 2 screws on the back of the controller and pull off the back plastic panel. Inside you’ll find the printed circuit board connected to the front of the controller (where the keys are) by a blue connector. (Circled in red in the picture) This is what’s come loose. Just push it back in, pop the back on, screw it in place and everything should be fine again.

I used some electrical tape over the connector and the back of the circuit board to keep it in place. The thing’s been fine since.


Copyright © 1996-2010 astroturtle. All rights reserved.
Jarrah theme by Templates Next | Powered by WordPress