
The final part of my Nexstar project was getting it on a wedge which would make auto-guided long exposure shots possible. Unfortunately, the Nexstar wedge has long since been discontinued and even if it hadn’t — $160 for a weenie little wedge for this scope was a bit much for me. So I decided to buy a cheap used wedge from an older Celestron system and make whatever modifications were needed to get it to work with the Nexstar.
What I didn’t expect was how little modification was needed to get an old 1980’s era Celestron C8 wedge to work with the Nexstar SE. All the holes, both on the tripod and drive base lined up perfectly and the only modification I really had to make to the wedge was to hammer out the center guide peg.
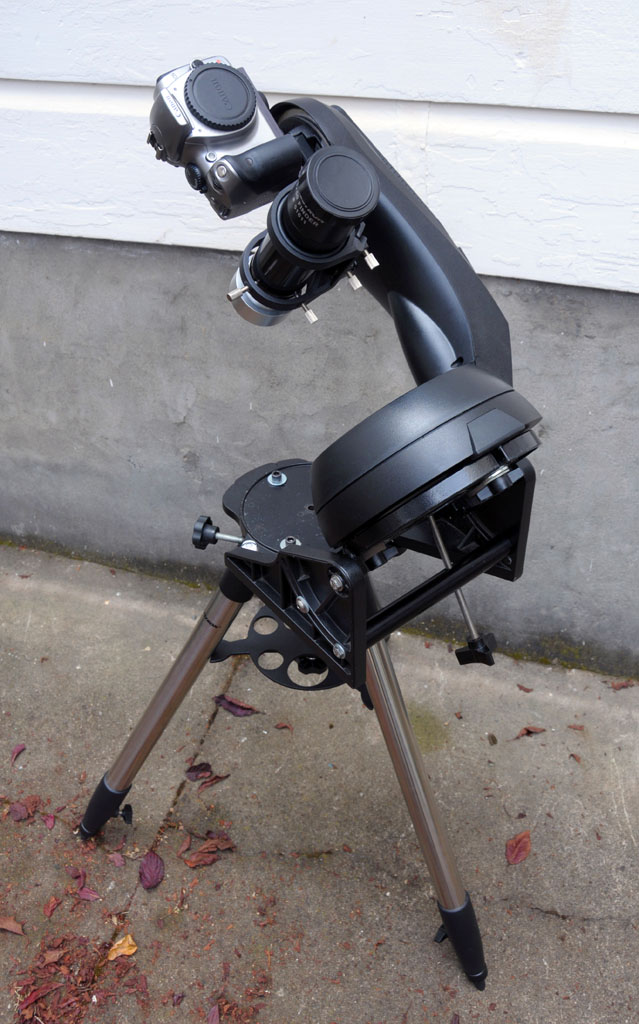
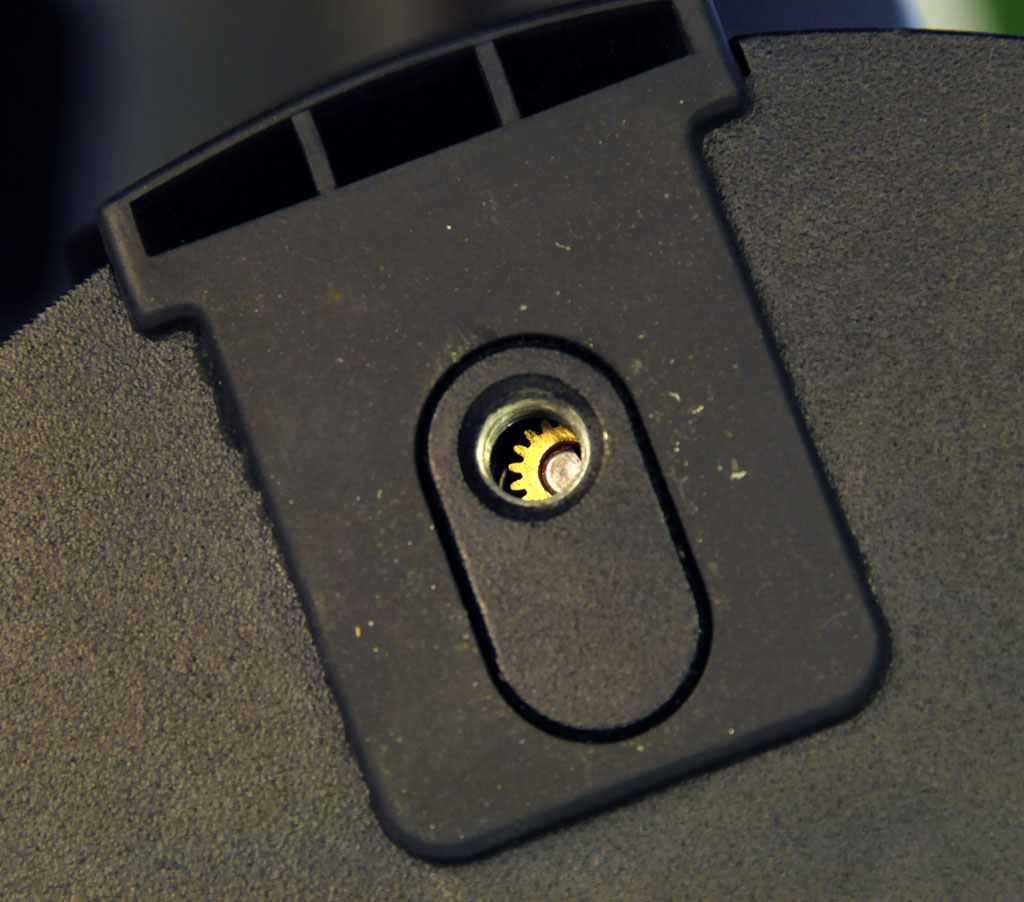
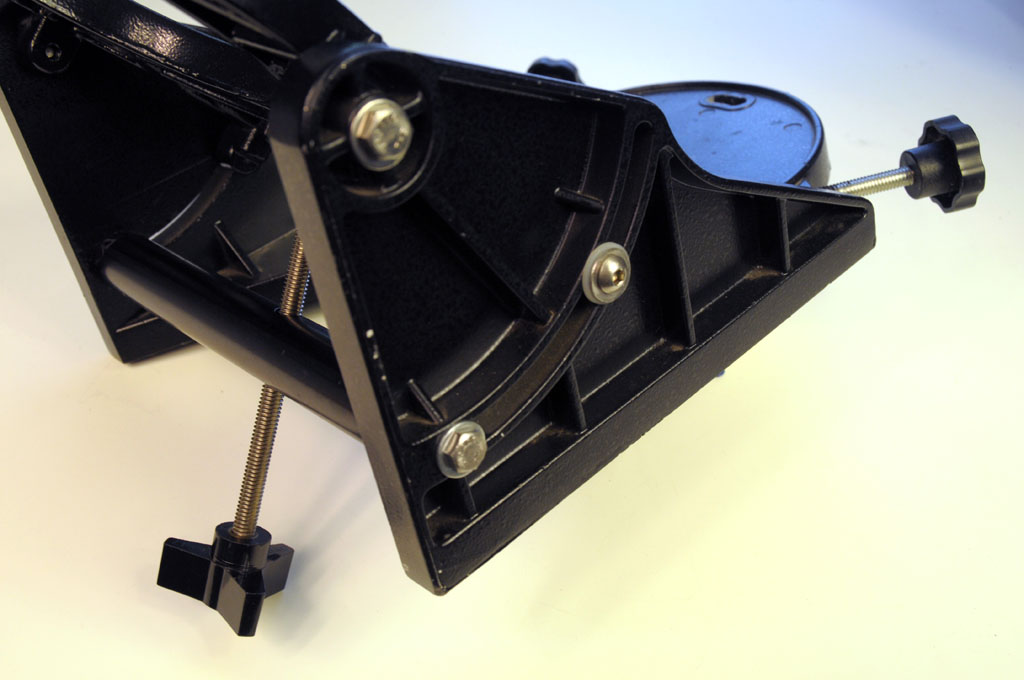
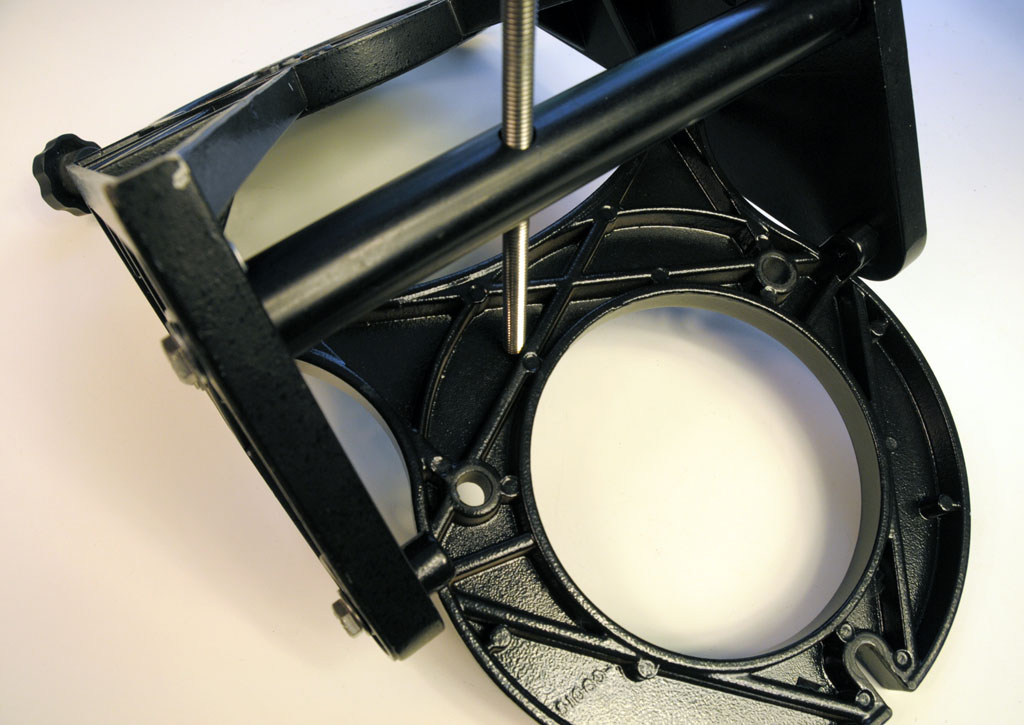
Mounting the NexstarIn the first photo on the right, the wedge with the center peg removed has been mounted on the Nexstar SE tripod. The center peg on the tripod fits well as it is much smaller than the space left by the removed wedge peg. The tripod bolts hold everything in alignment and there is little to no lateral movement of the wedge in relation to the tripod. The bolts are 5/16″ x 24 x 1.5″ cap screw bolts from the local hardware store. The azimuth adjusters work perfectly with this setup as long as you don’t tighten down the cap screw bolts too much. One rather major item of caution is the length of the bolts that attach the Nexstar drive base to the wedge. Inside the drive base is a gear (right under the fork arm) that rides very close to the opening for the mounting bolts and is completely unprotected. (Seen in the 2nd photo.) If a bolt is too long and protrudes very far inside the telescope, this gear will bind against the mounting bolt probably causing damage to the drive base. These bolts are 3/8 x 16 — I got lucky and had an extra set from my old Losmandy GM-8 that were the right size but much too long. I cut and sanded them with a Dremel and then added some thick washers just to be extra careful. The final image on the right shows underside of the wedge with the Nexstar mounted. Another modification I made was to remove two of the rubber feet from the Nexstar base to allow for more latitude range before the Nexstar base impacts with the side of the wedge as the drive base is slightly wider than the wedge. With the rubber feet removed I can get the latitude all the way to the 14 degree mark before the base connects with the wedge — with the rubber feet on, this was more like 30 degrees. The rubber feet peel off without too much difficulty and if I ever what them back on, they’re easy to reattach with some rubber cement glue. (I left one of the rubber feet on to designate the ‘top’ of the mount.) | 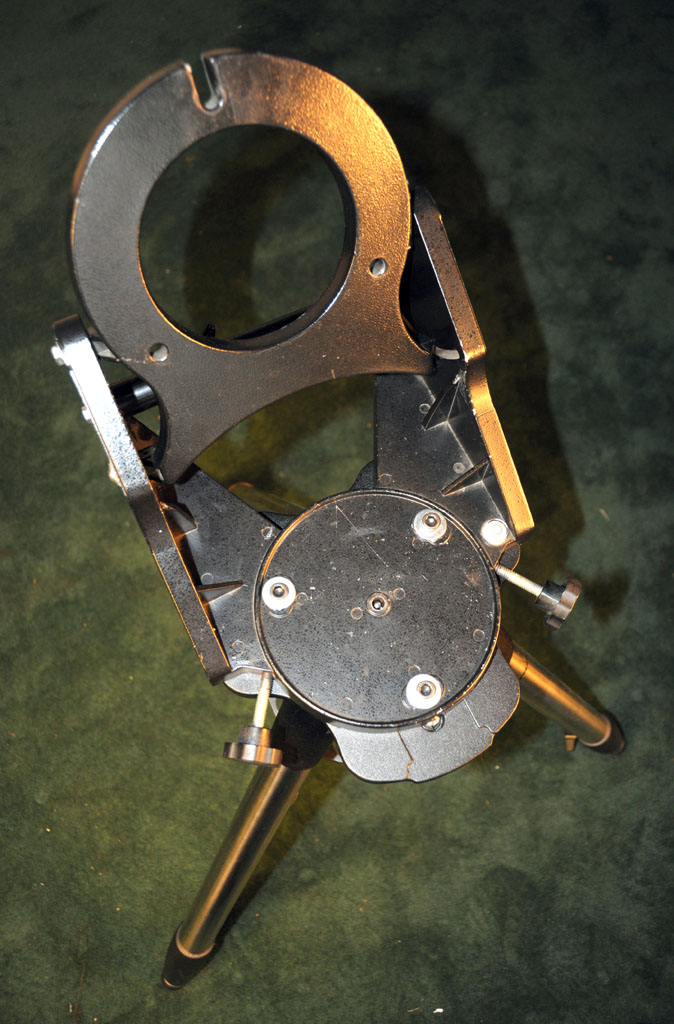 |
 | |
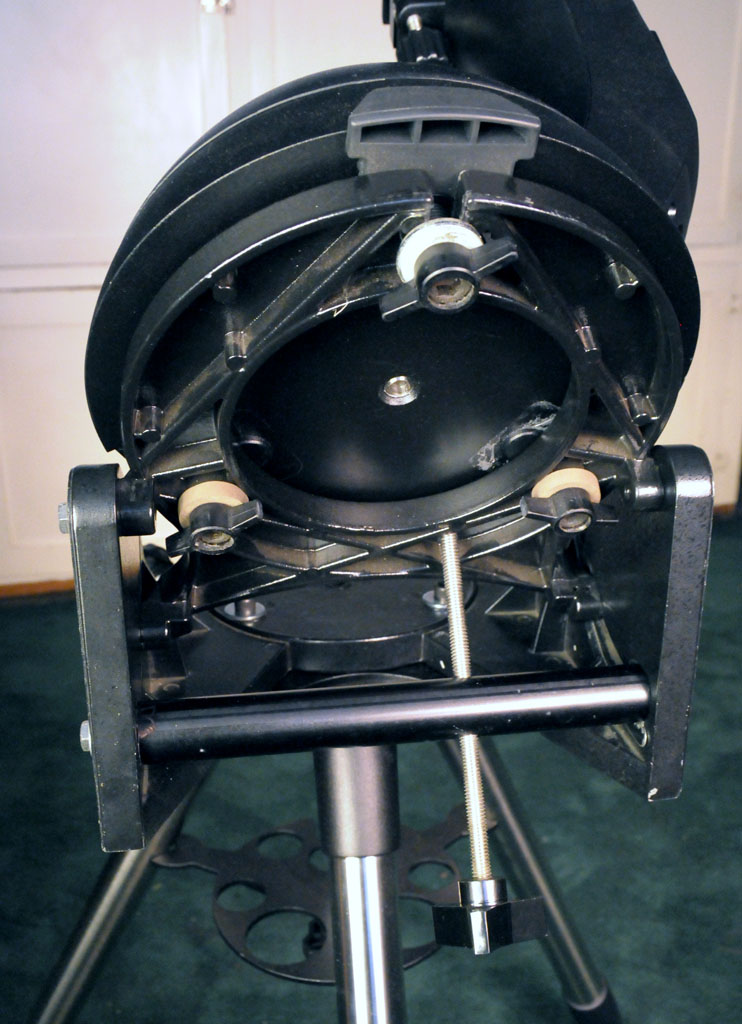
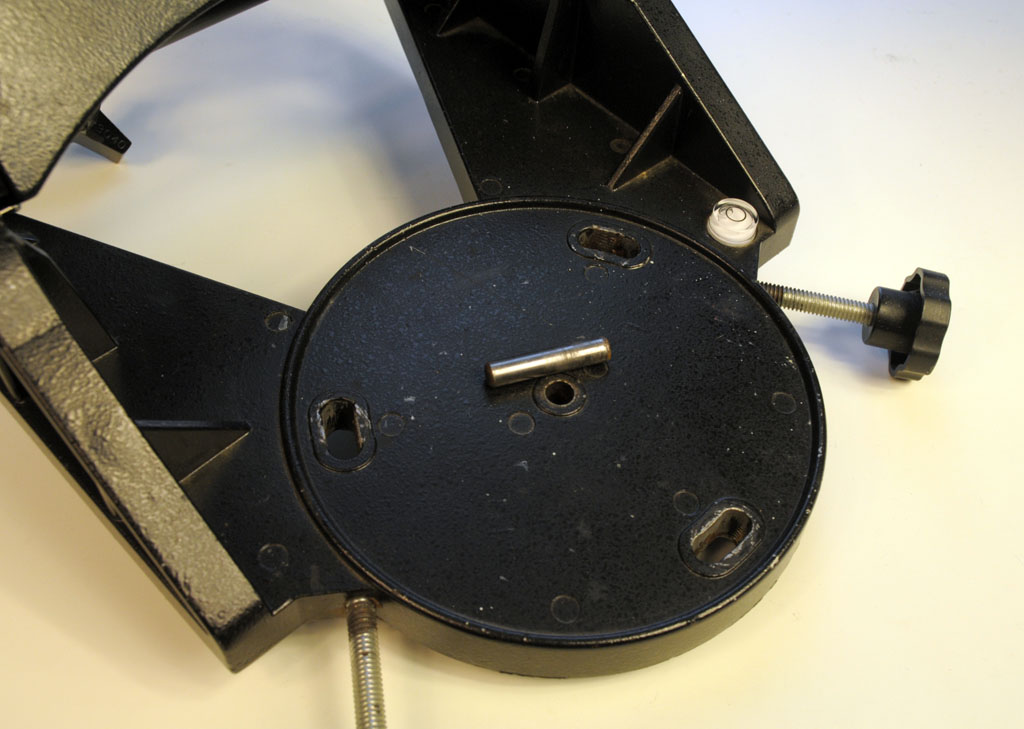
Adding a Latitude AdjusterMy very first telescope back in 1999 was a Meade LX50 on which one of the first modifications I made to it was upgrading the rather flimsy wedge latitude adjuster that came with that scope. Since then I’ve had the old adjuster kicking around from box to box mainly because I’m a pack-rat but now I’m glad I never threw it away! The length of the bar turned out to be too long for the Celestron wedge by only about 3mm. I cut and sanded the bar down to size with Dremel cutting and grinding disks (at one point I had to wear work gloves because of how hot the bar was getting!) until it was a snug fit and then ‘painted’ any visible scuffs with a black Sharpie. The end result almost looks like it was meant to be there. 😉 Once down to size, I fixed the bar in place to the lowest point on the latitude guide groove on the wedge with a couple of bolts and washers to hold it in place. The long latitude adjustment screw fits well to the underside of the wedge and since this setup is not going to take a bunch of weight (certainly much less than the LX50 it was originally designed for!) it works very nicely. This modification also added a great deal of stability to this wedge. I was lucky to have saved the LX50 latitude adjuster and I think that even if I didn’t have it, I would have eventually wound up trying to make something similar out of wood. One thing I’d eventually like to add is a pair of knobbed bolts in place of the current cap-screw bolts I have for the latitude adjustment on each side of the wedge so I can loose the allen wrench I currently have to use to loosen them. | 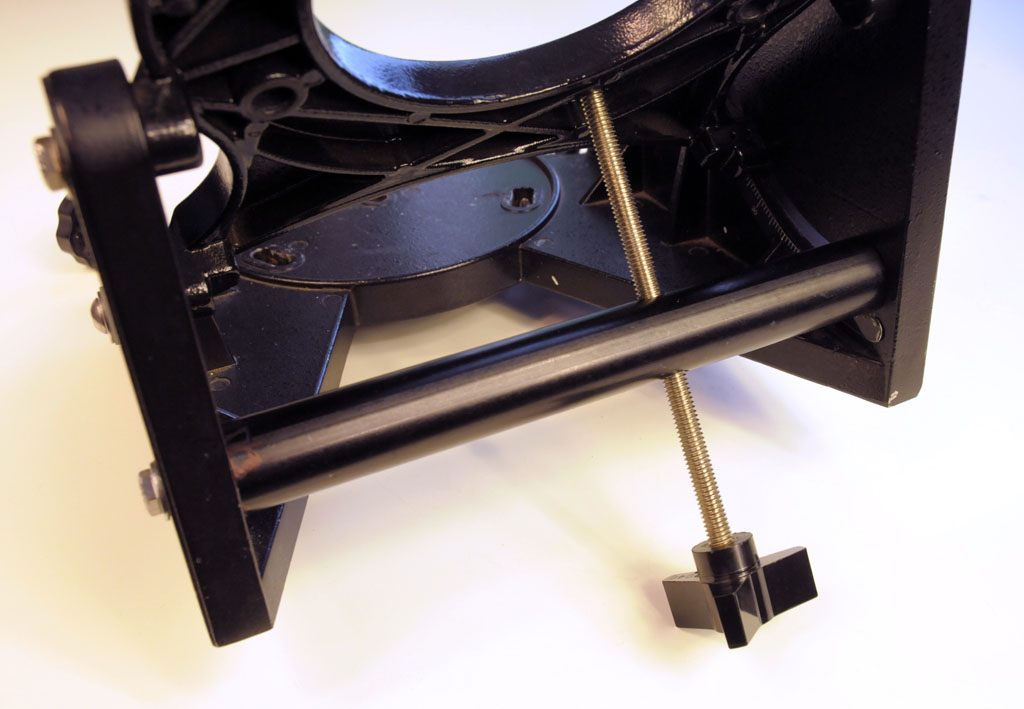 |
 | |